Zero-touch Enrollment is a Google service that requires Google Mobile Services (GMS) and is not available on AOSP Devices. To enroll AOSP Devices, use QR code provisioning. See AOSP Android Management for details.
Android Zero-touch Enrollment or Android Zero-touch Provisioning (ZTP) is a Device Enrollment method provided by Google that streamlines the Enrollment and easy deployment of organization-owned Android Devices in bulk.
Advantages of Zero-touch
One-time setup.
Aids large-scale Enterprise Device rollout.
Allows resellers to add Devices to the Portal, easing the Enrollment process.
Admins can set up the Device with the necessary Apps and profiles, and it gets applied automatically on Device activation.
Pre-requisites for Zero-touch
Android Zero-touch Enrollment is supported for Devices running Android 9.0 or later, purchased from specified reseller partners.
You need a Zero-touch Portal account, which can be obtained by contacting your reseller.
A Google account (associated with your corporate e-mail) is required to set up the Android Zero-touch Portal.
Integrate Applivery with Zero-touch
Once in the Applivery Dashboard, head to the Settings section and select the Android Zero-touch 2 from the left-hand menu.
You will need to link your Zero-touch to Applivery and follow the on-screen steps.

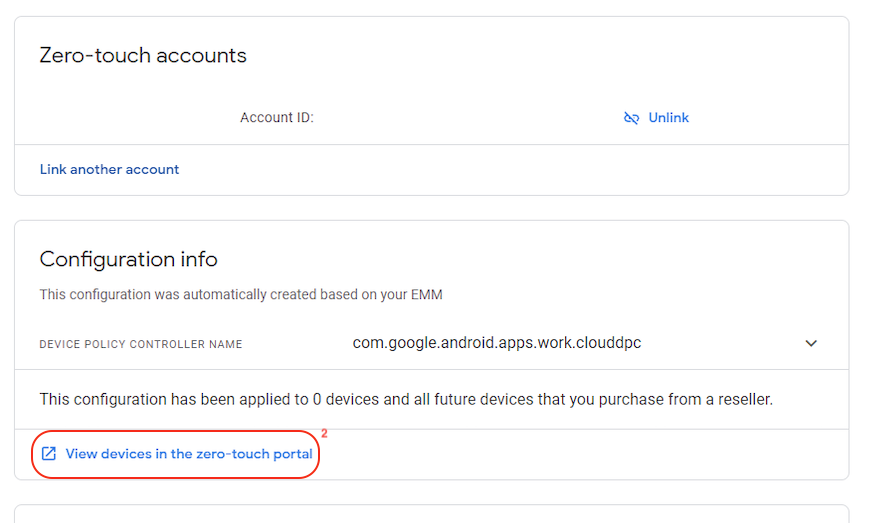
Once the integration has been successfully completed, you just need to click on View Devices in the Zero-touch portal 2.
A new window will open in your browser, where you will find the Configurations 3 section. You can add a new configuration by simply clicking the + Add configuration 4 button placed on the right side of the screen.

At this stage, you need to provide a name for the configuration and fill in the required fields. Pay close attention when selecting Android Device Policy in the corresponding DPC field. Additionally, you can learn how to obtain the JSON for the DPC extras field here.

The last step in the Portal is to associate the created configuration with the Devices. To do that, just select the configuration that is to be automatically applied to the added Devices and click the Save button.

Adding the configuration to your Devices
Once the configuration is created, navigate to the Devices section from the left-side menu. Here, you’ll find a list of Devices currently active with Zero-touch that need to be assigned a configuration. This ensures that automatic enrollment points to the correct configuration, allowing the Device to enroll properly.

To assign a configuration, select Edit on the desired Device. Then, choose the appropriate configuration from the drop-down menu.

From this point on, the Device will automatically enroll in Applivery after a factory reset, requiring no additional action.
Obtain the JSON for the DCP extras field
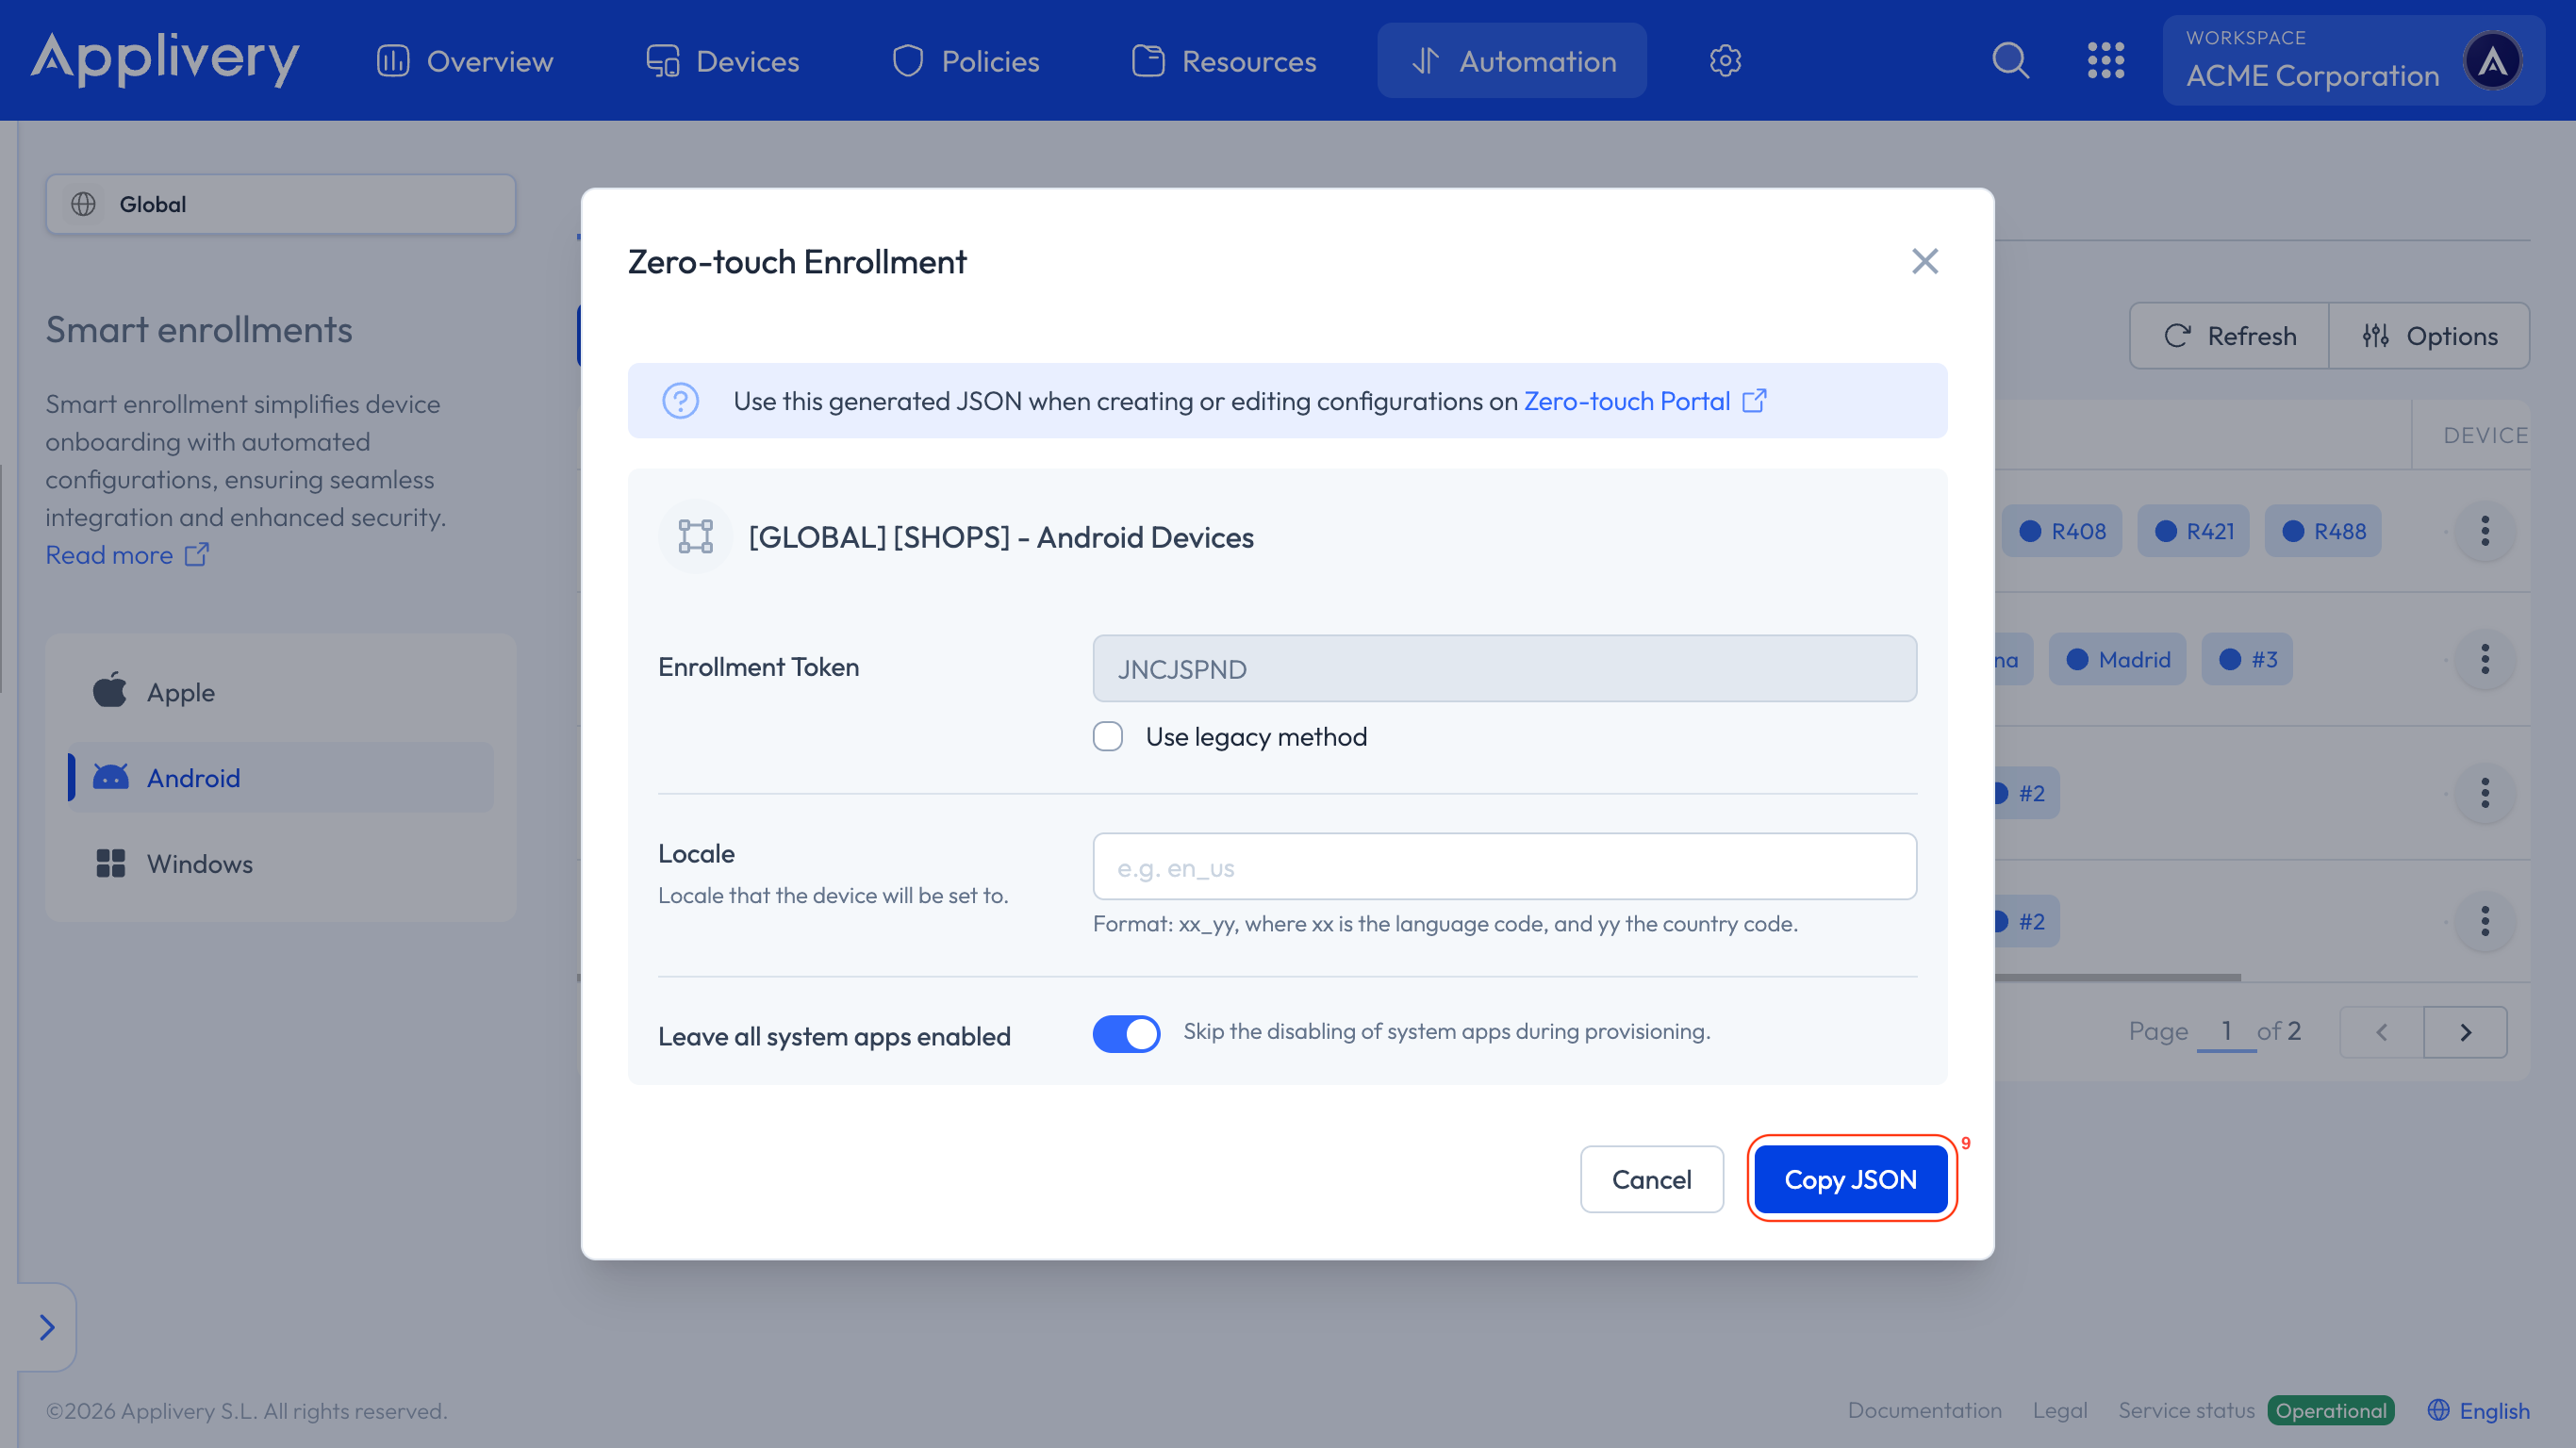
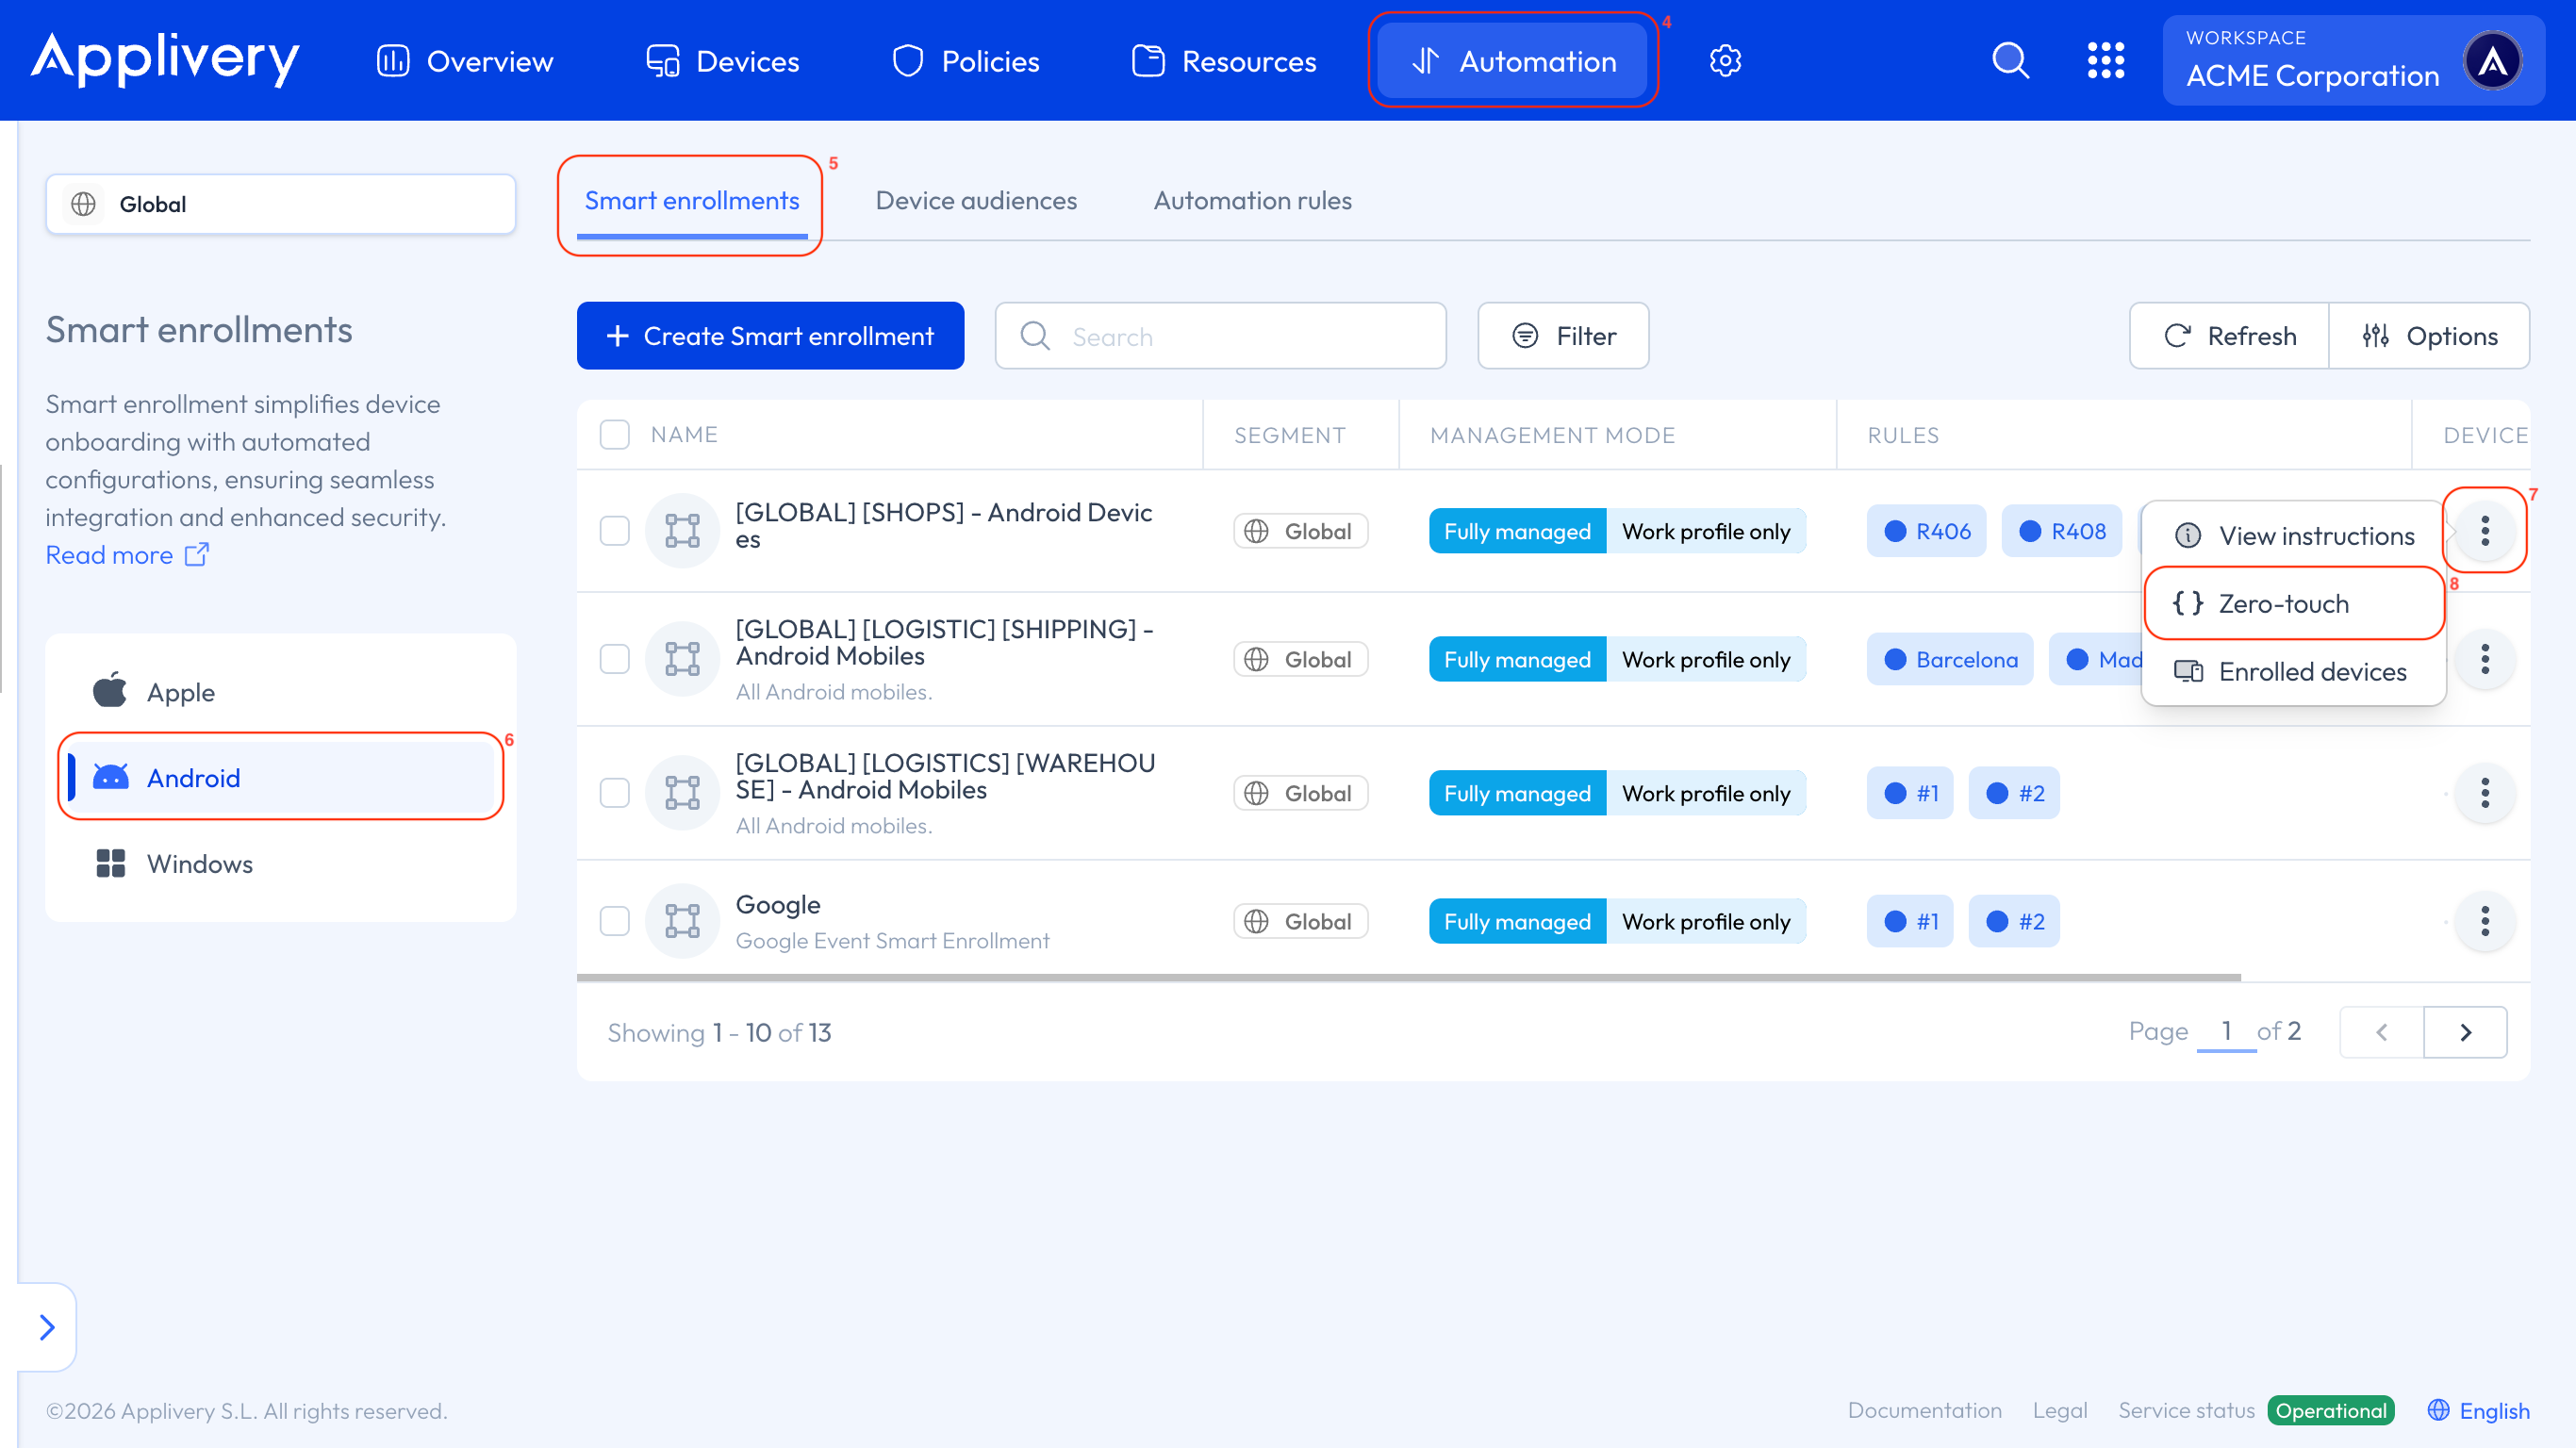
Once in the Applivery Dashboard, navigate to Automation 4, select Smart Enrollments 5, and choose Android 6 as the platform from the left-hand menu.
Then, click on the vertical dots 7 located at the end of the Smart Enrollment you wish to configure within the Zero-touch Portal and select Zero-touch 8.
A modal view will appear, allowing you to input additional configurations and Copy 9 the necessary JSON for the DPC extras.